
Does your quilt top have borders that wave at you? Here is a tutorial on how to create borders on a quilt so it lays flat.
The Secret Is…
Measuring. It’s always a temptation to simply sew on a border strip and then cut off the excess but don’t do it. Forcing your quilt top to match identically cut borders will force it to remain flat.
Step One: Measure your quilt vertically through the center. If it’s a large quilt, you can measure it in several place and then use an average. Cut your first two side border strips to this length. Pin the center of the border strip to the center of the quilt top.
Using a walking foot if you have one or lots of pins if you don’t, sew the side border strips to both sides of the quilt top. “Ease to fit” if necessary. Press to the Border.
“Ease to Fit” means that if one side of the quilt is just the tiniest bit larger than the border, place the quilt top down on the bed of your sewing machine when sewing the border strip on. The feed dogs will help take up the slack. Reverse the process if it is your
border strip that is bigger. Use pins liberally.
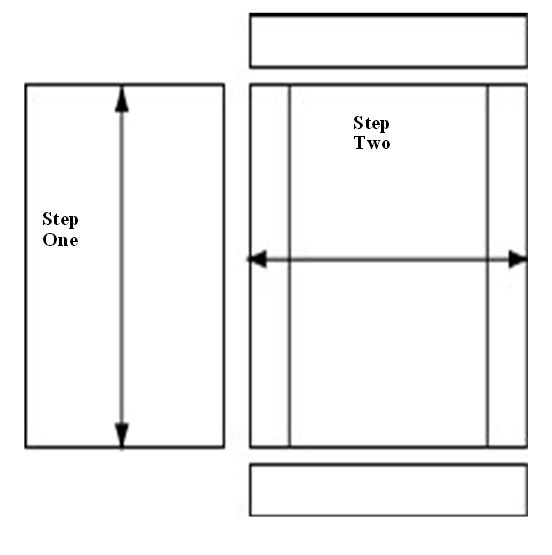
Step Two: Repeat this process for the other two borders.
This method works with mitered borders as well, but you will need also match the ends of the quilt top with the measurement. Any border fabric after that match becomes the fabric that you will use to make the miter. For more details, see Mitering a Border.
More Tips and Tutorials

How to Sew a Quilt Top that Lies Flat

Quilt Making Techniques

Quilt Making Articles
How to Make Quilt Blocks

Quilt Making Tutorials

Online Quilters Community

Quilt Shops in the US

Quilt Blogs